Classics: The Wonderful Wizard of Oz

This week’s post is yet another worksheet in my classics series. wonderful-wizard-of-oz
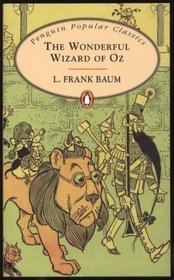
The Wonderful Wizard of Oz was published in 1899 and written by L. Frank Baum. It is the most famous story out of all the stories that have been written about Oz. This American fairy tale, as Frank Baum wanted it to be, is known over the whole world and has been adapted into a musical and is well known for its 1939 film adaptation. It did not stop there, however, there are many books, films and stories about Oz, think for example about the musical Wicked, which is a big hit right now.

My worksheet focuses on the children’s book, but it would be great if you would like to extend your lesson on the Wizard of Oz and use one of the many video clips available on the internet.

I hope this worksheet inspires you and the children you teach to explore Oz and I hope you will enjoy it as much as I did.
I think this story is also a great creative writing prompt. I did not add one in the worksheet this time, but you could easily ask the children to write about their own adventures in Oz or where they would go if they owned the silver shoes.

Have fun 🙂

Link: The Wonderful Wizard of Oz worksheet

Story Wheel

Story wheel2Hello everybody,

I have just come back from a lovely holiday on which I have come up with fresh new ideas. This week’s activity is a great post-reading activity because it gets the children thinking about the book they have just read in a creative way.

What do you need:

  • Thick paper, preferably one white sheet and one other colour for the background. You can decide how big you want the circles to be. A3 is probably nice because then they have a bit more space.
  • Pens, pencils, colouring felt tip pens etc.
  • Ruler
  • Plate and cup (to draw circles)
  • Scissors
  • Glue
  • Some extra paper if the children want to try out the pop-up version.

Steps:

  1. Give every child a sheet of white (thick) paper and let them draw a circle on it with a plate. Again, you can decide the size of the paper and the plate.
  2. Then let them draw smaller circle in the middle by using a cup or jar lid.
  3. After they have done that the big circle needs to be divided into six sections. They need to be roughly the same shape and size. The children can use a ruler to achieve this. Look at the picture for an example.
  4. Each section will represent a different part of the book. You can use the exercises from my example but you can also use different ones. You can also decide to have them draw more or less etc. Make sure the example with the different exercises is displayed somewhere so the children know what they are doing.
  5. The children can then work on their story circle individually by following the instructions all the way round.
  6. After they have finished their white circle they can choose another colour for the background. Make sure they cut the background circle slightly bigger so the colour can be seen.
  7. Then glue the white circle onto the coloured circle. If you are planning to hang them somewhere you can decide to glue a bit of rope in between so it will be easier to hang the circles in the classroom.

Optional:

You can allow the children to make some of their pictures pop-up pictures. For example the picture they draw of the main character and the theme. If the children want to make pop-up pictures they need to draw those pictures on a different sheet of paper and fold a little tab behind it to make it stand out slightly.

Tip:

You can also use a wheel for a different kind of activity. You could for example have the children make a book wheel at the end of the school year on which they draw and write about their six favourite books, you can then display those in your classroom so other children can get inspired to read those books.

Classics: the Wind in the Willows

the-wind-in-the-willows-ladybird-book-children-s-classic-series-740-gloss-hardback-1983-237-pTime for another classics worksheet, this time I chose the Wind in the Willows by Kenneth Grahame. I only read this book for the first time last year and I have to say I thought it was quite difficult to get through, but still very worth while. I also visited Henley on Thames last year and spent some time walking along the Thames which made it easier for me to imagine the scenes described in the book.

It might be a bit difficult for younger readers because of the language Grahame uses, but it can still be a very nice book to use in many classrooms. There are also many extra materials like YouTube clips and movies you can find on the internet. You could use those to visualize the story. Another idea would be to read the story to the children and discussing the words and phrases they might not know.

I hope my worksheet will help you teach this wonderful  and unique classic. As always, please do delete and/or add things to it to make sure the children you teach get the most out of it.

link: The Wind in the Willows Worksheet

Enjoy!

P.s There will not be a post next week because I will be on holiday in Sweden 🙂 See you soon!