Let it snow!

I am sorry it has been ages since I have written a post, but I have just been too busy lately.

However, I just had to share this lovely activity with yoSAM_2998u. I found this online (so I did not come up with this myself) and tried it out and the result is just lovely.

In this post I am going to show you how to make your own snow globe and how you can encourage your children to write with a great winter-themed writing prompt.

What do you need: 

  • Plastic see through desert plates
  • Different coloured paper for the background
  • Craft materials like: glitters, silver and gold coloured paper, colouring pens and pencils etc. The nicest thing would be for the children to have as many different materials to work with as possible. For mine I also used some make-up pads to create snow.
  • Artificial snow
  • glue and scissors – the glue I used was a bit cheap and therefore left a mark. I think it would be best to use a glue gun or school glue.
  • Paper and pencils to write
  • I also used a star-shaped and a tree-shaped paper cutter but this is optional.

Steps: 

  1. Draw the shape of the plate around a piece of coloured card and then add a bit at the bottom to make it look like a snow globe and its support.
  2. Cut out this shape.
  3. Decorate the circle that will be covered by the plastic party plate. I made a snow man in mine but allow the children to be as creative as possible. I have also seen examples online of teachers who allowed the children to use pictures of themselves in the globe, which makes it a bit more personal and adds to the value of the writing prompt.
  4. Once the children have decorated the inside of their globes you need to make sure you put some artificial snow on the project. Make sure the snow is only put in the middle of the decorated snow globe, because you will need to glue the plate onto the piece of card and you don’t want any snow on the surface you are going to glue. (Younger children will need help with this.)
  5. Glue the plate onto the card so that it covers the decorated part. Once it has dried you should be able to pick up the project and shake it, so the children can move the artificial snow over the decorations.
  6. The only thing left to do is decorate the rest of the project. On mine I have cut out some letters which read: LET IT SNOW. But you can also use this space for the writing activity. If you want to do the latter I would make sure it is a bit bigger so there is plenty of space to write.
  7. You can also choose to do the writing prompt separately. There are many templates for this prompt, but you could also just write the prompt on the board and allow the children some time to write their story. The prompt could be something like: If I lived in a snow globe (I would)………. And of course it would be great to hear some of the stories once the children have finished.


Have fun!
Get them writing!

writingSorry it has been a while since I posted anything. I started a new job and it has kept me busy and tired! 🙂

Though, today I am back with three creative writing activities to do in class or at home.

1. Picture story 

For this activity you need a wordless picture book. An example could be Quest by Aaron Becker. You can introduce this book to the children or ask them to look at what they see in pairs. They can then construct the story and write it down. You can ask them to write the story for the whole book or just for a couple of pages and mix and match a story out of what the children have written. It will be interesting to see what they come up with and how different they can interpret the story.

2. Dream diary 

We all know how strange our dreams can be sometimes. For this activity the children will need to write down what they have dreamed for a week. Even if they can just remember one thing they should write it down. Then at the end of the week they can use these notes to write a story based on their own dreams. They can mix and match or if they had a very vivid dream they can use that one and add things if they see fit. There might be children who do not remember their dreams at all. In that case you can borrow and bring a dream dictionary and they can open this book on a random page and use that as a story starter.

3. Alien 

You can introduce this activity in different ways. You can ask the children to imagine that there is life on other planets and ask them what the aliens who live on that planet would need to know about us in order to not be afraid of us. Maybe you can ask the children to come up with a secret language that only the aliens can understand. Another way of introducing this activity would be to pretend that you received a letter from an alien in the post and to read this in class. You can then ask the children to write back a message and answer his questions. An example of a question could be: what kind of food do you eat on earth or what does a day on earth look like? You can make it into a bit of a competition by picking the best (few) letters at the end and pretend send those back to the return address.

I hope you enjoy these story starting activities! Please share if you want to add any of your own.

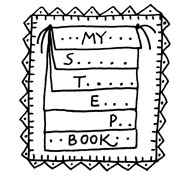
Step Book

step_titleHello everybody,

I am sorry I did not post anything last week but I moved house and then went on a short holiday straight after. I am back now and ready to write another post.

Today I will be showing you how you can make a step book with the children you teach.
A step book can be a fun way to get the children to write and draw a short story to share with their classmates.
As the teacher/parent you can decide whether the exercise should have a theme or whether you allow the children to make and write anything they like.

What do you need:

  • 3 pieces of paper (all the same size) – the best paper to use is either A3 or A4.
  • Hole punch and yarn or a stapler.
  • Colouring pencils and pens.

Steps: 

I found this lovely website on which they explain very clearly what you ought to do. I will share the website and the pdf instruction file with you. They have also published a YouTube video on which you can see how to make the Step Book.
I just want to stress that this is not my website, it is someone else’s work which is worth checking out.

website : http://www.makingbooks.com/step.shtml
PDF file: stepbook
YouTube video: https://www.youtube.com/watch?v=OascQW0cH_Q

Ideas: 

  • To make the book more colourful you can use different coloured paper.
  • Because the holiday is (almost) over you can ask the children to make a Step Book about their holiday adventures.
  • The children can decorate the pages with pictures cut out of magazines, news papers, old books etc.
  • You can also combine this exercise with one of my earlier exercises and have the children write down a top 5 of books at the beginning of the year. Every page of the step books (with three pages you will have 5 + a title page on which they can write their name) will represent one book and the pages can be numbered, decorated and written on. You can keep these in the classroom to give children reading ideas. It might also be fun to have them look back on their top five at the end of the school year and see if their top five has changed.

Travel Games

This week’s post is about games that can be played while you are travelling somewhere. During the summeroadtripr you could find yourself stuck in your car for a long time, without any way of entertaining your kids.

I hope that this week’s post will help you inspire your children to play any of these travel games. I might have mentioned some of these games before, but they will be perfect to play on route.

  1. Would you rather….?

This is a perfect game to play while you are travelling and you can easily give it a book theme. Have your children ask each other questions about characters from books they have read. All questions will begin with ‘Would you rather….?’ and the aim of the game is to give two options to choose from. The child answering the question will have to explain why.

For example: Would you rather be Ron or Hermoine?
Would you rather read books or watch movies?

Of course the topic of the questions can also vary to more general questions, questions about movies etc.

A variety on this game is to ask more open questions like: Would you have liked the visit Willy Wonka’s factory?
Or you could mix the two types of questions.

  1. Story-telling

This game can be verbal or written down. It is a creative game in which one player starts a story with one sentence and the other players add to the story with their sentences. The plot of the story can change with every turn and you need to work together to make the story evolve.

  1. Alphabet game

In this game you go through the alphabet and each letter represents a character or book. So for example if you are player 1 your letter is A and you need to think of a character or book starting with A. You could put a time limit on it to make it more competitive.
You can also play a variety on this game in which one player starts by naming a character and the next player has to think of another character that starts with the last letter of player 1’s character. For example: player 1 says Alice and then player 2 can say Eragon, etc.

  1. Who is the neighbour?

One thing I always like when I go somewhere is to watch people. In the car the players could look at people, animals or places on their way and make up imaginary stories about them. They could imagine where they are going, where they are from and what they are thinking. It does not have to be the truth, let their imagination go wild.

  1. Number plate story

Another way of storytelling could be by looking at the letters in the number plates of passing cars. Tell stories in which the first letter in the number plate is the start of the main character’s name, the second is the start of the name of the place and the third could be the start of an animal that is in the story. The children can think of their own rules for what the letters should represent.

  1. Hot seat/ who is it?

I have talked about this game before, but it is brilliant to play while you are on your way. One of the players takes a character of a book in mind and the other player will have to ask questions to find out who they have in mind. The questions can only be answered with ‘yes’ or ‘no’.

Fairy Mail

This week’s post has a fairy theme. I thought it would be fun to make a door into a different world, one that can make your children or the children you teach wonder about what could be behind the little door.

As well as making the little door you can craft a mini letter and envelope with a message for whatever the child imagines can be found behind the door.

What do you need for the door?

  • Popsicle sticks
  • Card board paper
  • Paint in any desired colour
  • Glue that glues wood, beads and other decorations
  • Beads, fake flowers, things found in nature, etc. to decorate the little door

Steps to make the door:

Instead of taking you through every step I will show you a picture I found on the internet and give some tips or suggestions. (http://pennywiseblog.blogspot.co.uk/2012/11/a-scandinavian-christmas.html)

Tips:
* It might be a nice idea to use a nice bead for the door knob.pennywiseelfdoor
* A welcome sign could be nice or maybe some moss on the top or bottom of the door.
* The child does not have to paint the door in one colour, they can also decide to make a rainbow door for example.
* When the door is ready you can place it anywhere in the house, the garden or the school and the children can start imagining what could be behind it. Maybe they can even write a little story about the door and the world hidden behind it.

What do you need for the letter and envelope?

  • Paper (I used small post it notes)
  • Pencil (with sharp point) or fine pen.
  • Coloured pencils or other coloured paper to decorate with stamp on the front and seal on the back.
  • Some glue/ pritt stick

Steps to make the envelope:

I drew my envelope first so I would know the right sizes and where to fold. I used a pink post it note because that was what was available but you can use any kind of paper as long as it is easy to fold.

On the picture you can see the measurements I used. This is just an example, it does not have to be exactly the same.

My envelope is 8 cm is length and 5 cm in width. I will exaplain what the numbers mean next.

  1. These are the two folding strips. Mine are 3 cm long and 1 cm wide. I drew them 6 cm from the bottom (nr. two). They are numbered as one because they are the first part you need to fold in when you cut it out. You simply fold them inwards on the line.
  2. This is the second part you are going to fold. It will fit nicely on top of the two numbers ones. You put glue on the other side of the ones to secure this part on top. You can already see it is an envelope after you have done this. My number two is 3cm by 3cm.SAM_2987
  3. You fold number three once you have put the letter inside. You can then either glue it shut onto number two or you can make a little seal to glue on top. I cut the corners of my number three to make it look more like a real envelope.

After I cut out and folded my envelope I used a bit of left over paper to write a tiny note. Let the children be creative and allow them to write to whoever they think could be behind the door.

Enjoy this magical craft and writing session!    SAM_2988

Land Ahoy!

Today’s post is a creative writing activity which could be fun for the school holidays.
I always like reading books with maps in them because it makes it easier to imagine the kingdom, island or country that you are reading aboSAM_2982ut.

For today I thought, why not turn it around and have children create a map of an island before writing a story about it!?

What do you need:

  • Paper (I used card board but you can use any paper you have available)
  • Pencils and eraser
  • colouring pens/pencils

Steps:

  1. First of all you and the children could make a list of the things you would be able to find on a fantasy island. This could be a very long list, but it is a great way to get the imagination going.
  2. Then you give all the children a piece of paper and a pencil and have them come up with a draft. First of all they need to come up with the shape of the island and then they can start to decorate it.
  3. When I did my example map I outlined the island first and then I wrote down the areas I wanted to have on my island (see picture) SAM_2981. After that I started to draw pictures of what might depict that part of the island best.
  4. Once the children finish their draft they can use colours to make it look like a proper map. A nice touch (to make a map look old) is to burn the edges of the paper with a match. You should of course supervise to make sure nothing else is set on fire.
  5. Once the map is finished you can ask the children to write a story about their island or to make a description of different parts of the island. I could for example write about why the giants are sleeping or I could write a story about a girl who spends an afternoon on ‘miracle beach’, or maybe I could write about strangers setting foot on the island for the first time.  The possibilities are endless.

I hope you and your children enjoy this activity! 🙂

Three Chapters

Hello everyone,

First of all my apologies that I did not post last week. My week was a bit hectic and I did not get round to it.
hatI am back now 🙂

I believe most school will have broken up now and surely you have not made plans for every day your kids are at home.
Today I will be posting a book variation on a game I learned while at university last year.

This is a fun team game that kids can play with friends, parents and teachers.

What do you need? 

  • Pens/ pencils
  • Paper cut into small pieces
  • A bowl, hat or other objects to put the pieces of paper in

Steps: 

  1. First of all you need to make teams. The minimum amount of people you need to play this game is 4. But you can play it with many more people. 5 teams of 2 would probably be a maximum though, because otherwise there is a lot of waiting.
  2. Let’s say you have 3 teams of 2 players each. You give each player 5 pieces of paper. You can give more or less pieces, depending on how long you want the game to last.
  3. Tell the children to write down titles of books or book characters on these pieces of paper. Make sure to tell them they should keep in mind that the other players must know/ must have heard of the books or characters. They do this on their own, not in their team.
  4. Tell them to fold the pieces of paper twice and put them in the bowl/ hat.
  5. Then the game has three rounds. I will explain this before anything else.
    round 1: Forbidden word – one of the two team members opens one piece of paper and has to describe the book/ character to the other without using one of the words of the title. To make this a bit harder you can tell the kids they can write down two more words on the piece of paper that cannot be used. This might especially be necessary with the characters.
    round 2: One word – after round 1 all the pieces of paper go back into the hat/bowl and therefore round 2 will be played with the same books/characters. In round 2 the player opening the piece of paper can only use one word to describe the book/character. The best thing to do is to use a word that was used in round 1.
    round 3: Acting it out – after round 2 all the pieces of paper go back into the hat/bowl again. However, in round 3 no words or sounds are allowed to be made. The player opening the piece of paper has to act out the book or character.
    Because you keep using the same books/ characters the rounds should speed up and become easier every time.
  6. The game works as follows. First determine which team will start. You can use a die to determine this. Write down a chart with the teams and the rounds. Then the first pair can start. Every pair gets a set time to get as many points as possible. You can determine what the time should be. When I played it we had a minute. One of the two gets a piece of paper and starts. If the other player guesses the right book/ character the team can keep that piece of paper and that is their point. Once a piece of paper is taken they have to stick to it. You can make it one rule that they can change it once if the character or book is unknown to the person describing it. Once the timer goes off the hat/bowl is passed on to the next team and so on. At the end of round 1 the pieces of paper per team are counted and the score is noted on the chart. Then the pieces of paper go back into the bowl/hat and round 2 starts in the same way.
  7. At the end all the points are added up and that will determine the winning pair.

I hope you enjoy this game 🙂

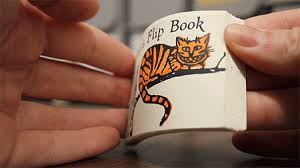
Flip Book

flip bookToday’s activity is another fun one for the school holidays. It is easy but you need to draw/write quite securely to make it work.
I think we all know the little books that tell a story simply by flipping the pages. Well, by following the steps and looking at the videos in this post you can make one yourself.

I tried to make one myself today and the key is not to start with something too complicated. Start simple and improve your skills if you (or the children you teach) like the activity.

What do you need:

– a stack of paper of small pieces of paper – these can either be cut from A4 paper and stapled together or they can be post-it notes or other small note pads. I used paperclips to secure my pieces of paper together.
– pencil and eraser
– ruler
– colouring pens and pencils (optional)

Steps: 

1. The first thing to do it to make sure your pieces of paper are of equal size and are lying on top of each other without any of them sticking out.
2. Then check where the fold is and how big the fold is when you like at the piece of paper on the bottom. This is just to make sure you will not draw where it cannot be seen.
3. After that you need to think of your animation. I will post some links with easy animations and explanations. Do not try something too complicated in the beginning.
4. Then start drawing the first part of your animation on the last page because you will flip from back to front. You can use a ruler to measure where to draw.
5. Then go to the next page and draw the next part of your animation. This part is hard to explain, but the videos will make clear what I mean. Do not try to make it move too fast, because then it will not look as good.
6. Keep drawing the small changes until you reach the fore last page (seen from the back).
7. Leave the front page empty. On that page you can draw the cover of your flip book, and maybe also write down a title.
8. Now, test your animation 🙂

Example videos: 

https://www.youtube.com/watch?v=29SCiHN9zCI – this one shows mainly how to make the booklet from A4 paper.

TIP: 

If you would not like to draw but simply create a flip book, there are many templates that can be found online. You then simply cut out the pictures and staple them together to create a little booklet.

Enjoy 🙂

Book and Story Decorations

CAM00105 (1)Summer is coming and that means that kids will be home from school soon. That is why some of my posts this summer will be more about craft to do with reading and writing, because it might be nice to get creative with your kids this summer 🙂

Today’s activity is about making your own wonderful decorations using only (thin) paper and varnish glue. I will post a picture of a Pride and Prejudice style decoration I made myself in under an hour.

What do you need: 

– Varnish glue (decopatch has many varieties and it can be bought in any craft store)
– Napkins, old (picture) book pages and other nice (thin) paper
– Scissors
– Small paint brush
– A wooden or paper box, decoration, letter etc.

Steps: 

1. First of all you need to make sure the surface you are using is dirt free and dry.
2. Then decide what you are going to make and what kind of patterns you would like to use.
3. Then spread a thin layer of varnish on the surface and stick your paper onto it (small pieces of paper (patch work) is easier to manage than large pieces)
4. Then put a bit of glue on the brush and moving from the inside of your paper spread the varnish over your piece of paper towards the outside. Make sure the varnish is spreads nicely. At first it might look like it will leave some white glue stains on your project, but when it dries it will be clear.
5.  Keep on doing that until your whole surface is covered.

Tips: 
If you want to make this exercise more educational you can get the pupils to write words on the paper before varnishing it. For example, the decoration I made is made out of pages from Pride and Prejudice and a silhouette I drew. I could have put key-words about a character or about the book around it. Or, you can provide them with magazines and have them cut out key words that remind them of the book they have just read.

Another really nice project is to decorate the first letter of your name to hang on your bedroom door. The letters can be bought at many craft stores. I will post a picture of an example I have found online. decopatch letter

These crafts also make a really nice present. You can varnish most surfaces. You could for example also use glass jars/vases. Check out Pinterest for many amazing ideas.

Classics: The Wonderful Wizard of Oz

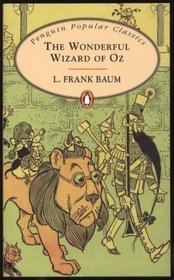
This week’s post is yet another worksheet in my classics series. wonderful-wizard-of-oz

The Wonderful Wizard of Oz was published in 1899 and written by L. Frank Baum. It is the most famous story out of all the stories that have been written about Oz. This American fairy tale, as Frank Baum wanted it to be, is known over the whole world and has been adapted into a musical and is well known for its 1939 film adaptation. It did not stop there, however, there are many books, films and stories about Oz, think for example about the musical Wicked, which is a big hit right now.

My worksheet focuses on the children’s book, but it would be great if you would like to extend your lesson on the Wizard of Oz and use one of the many video clips available on the internet.

I hope this worksheet inspires you and the children you teach to explore Oz and I hope you will enjoy it as much as I did.
I think this story is also a great creative writing prompt. I did not add one in the worksheet this time, but you could easily ask the children to write about their own adventures in Oz or where they would go if they owned the silver shoes.

Have fun 🙂

Link: The Wonderful Wizard of Oz worksheet